Tuesday, August 18, 2015

Trade Book Tuesday: Just a Dream {Skill: Asking & Answering Questions}

I am so excited to to kick off my Trade Book Tuesday feature again! I started this years ago, but dropped the ball after school got crazy busy. 

However, my sweet friend Tess from The Krafty Teacher encouraged me to start this again, and then get ya'll involved too! So, we partnered to turn this into a monthly linky! (Stay tuned to the end of this post to see how this linky works!)

I am so excited to share with you one of my favorite books to teach Asking & Answering Questions with 3rd-5th graders. I love using all Chris Van Allsburg books in my classroom. They spark interest, intrigue and most of all, cultivate rich, deep discussion and questions. With that being said, pretty much any one of his books would be great for teaching students to talk back to a text through questioning. However, I chose a unique and thought provoking book for this post; Just a Dream
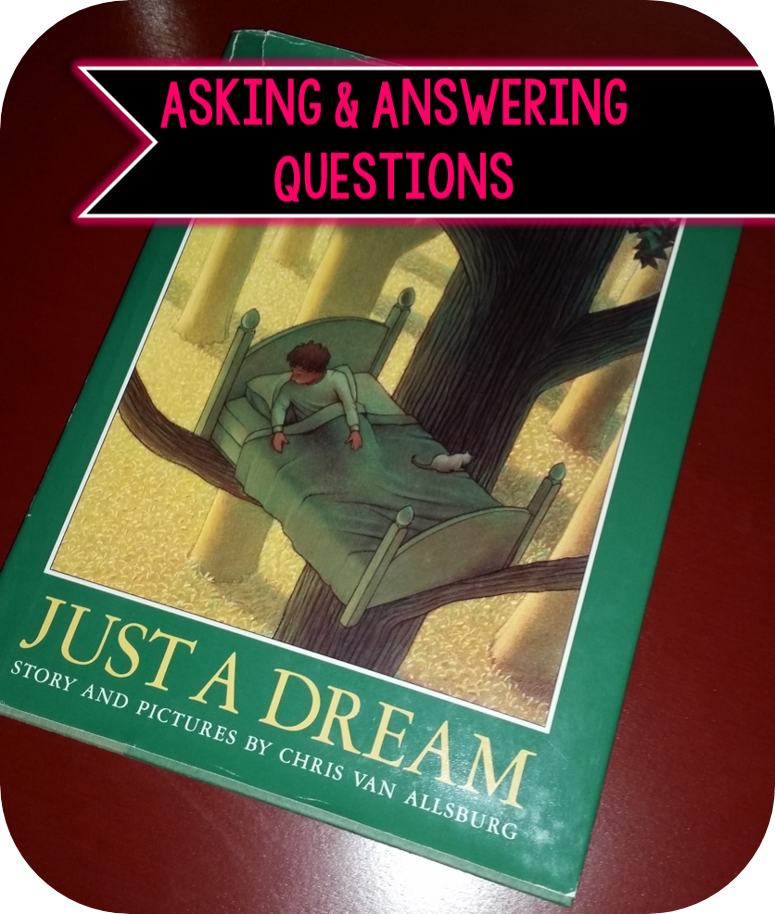
This book, Just a Dream,  follows the journey of a young man named Walter who aimlessly lives in the world, littering and not caring about the environment. Walter dreams of a life in "the future" with robots that sort his trash and and lots of machines. He doesn't understand why his neighbor Rose loves plants and why he should have to separate his garbage or recycle.

The story causes students to think deeply about the content in this book, ask questions about the character, and make text connections. The reader faces their own feelings about the environment, as well as questions about their author's point of view verses their own, as well as the author's message to the reader. Formulating questions before, during and after reading this book is not hard. In fact, it's a must as the reader connects with the text and with Walter, the main character. 

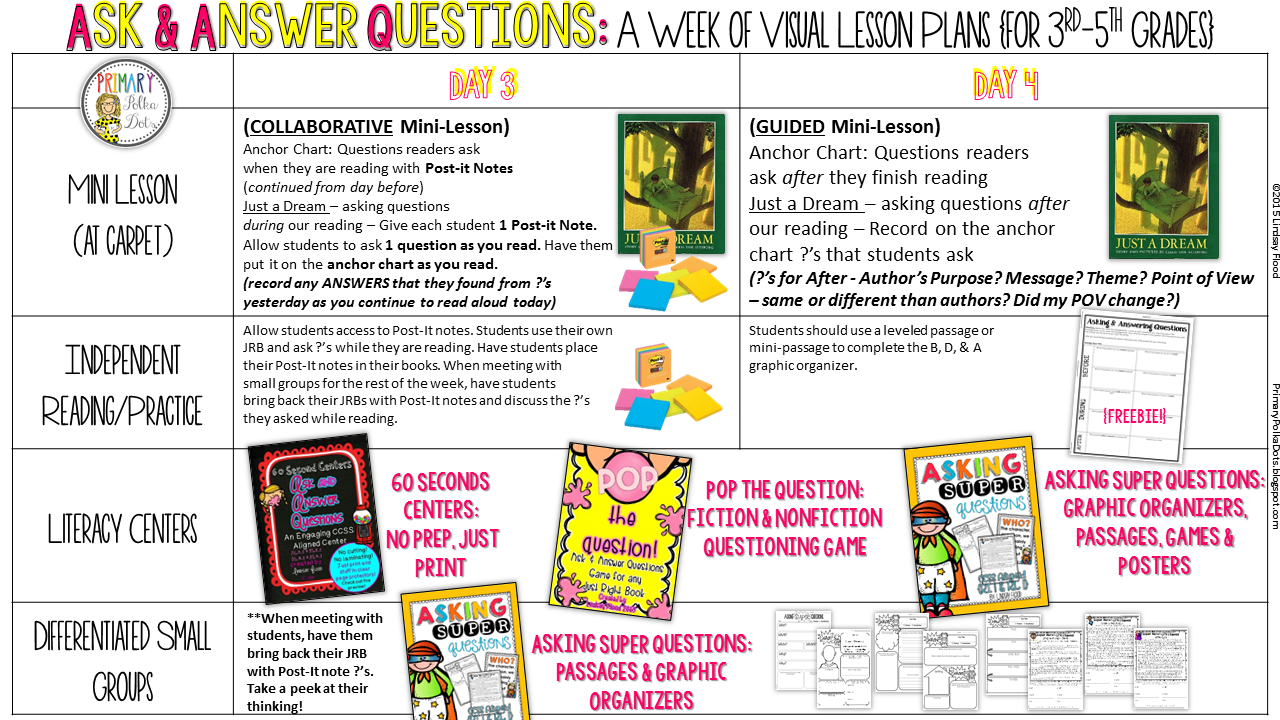
Here are my visual lesson plans for a week of teaching Asking & Answering Questions with my students using the book Just a Dream. As you scroll down, I'll briefly explain how the mini-lessons work, following the gradual release of independent learning. 


(Asking Super Questions {HERE}, Ask and Answer Questions: NO PREP Center {HERE}, & Pop the Question: A Game for Fiction & Nonfiction Texts {HERE})
Mini-Lesson #1 (No longer than 15 minutes):

  • When introducing questioning techniques, students must already need to know how to make text connections and recall information.
  • For real readers, we want them to be able to ask deep questions that allow them to connect with the text.
  • Students need to ask deep questions that give them juicy answers. In order to do this, we have to ask questions that are more than "Who is the main character?" or "Where is the setting?" Although these questions are important, they aren't meaningful in connecting with the characters, the author's purpose/word choice, making inferences, drawing conclusions, and understanding the author's main message to the reader. 
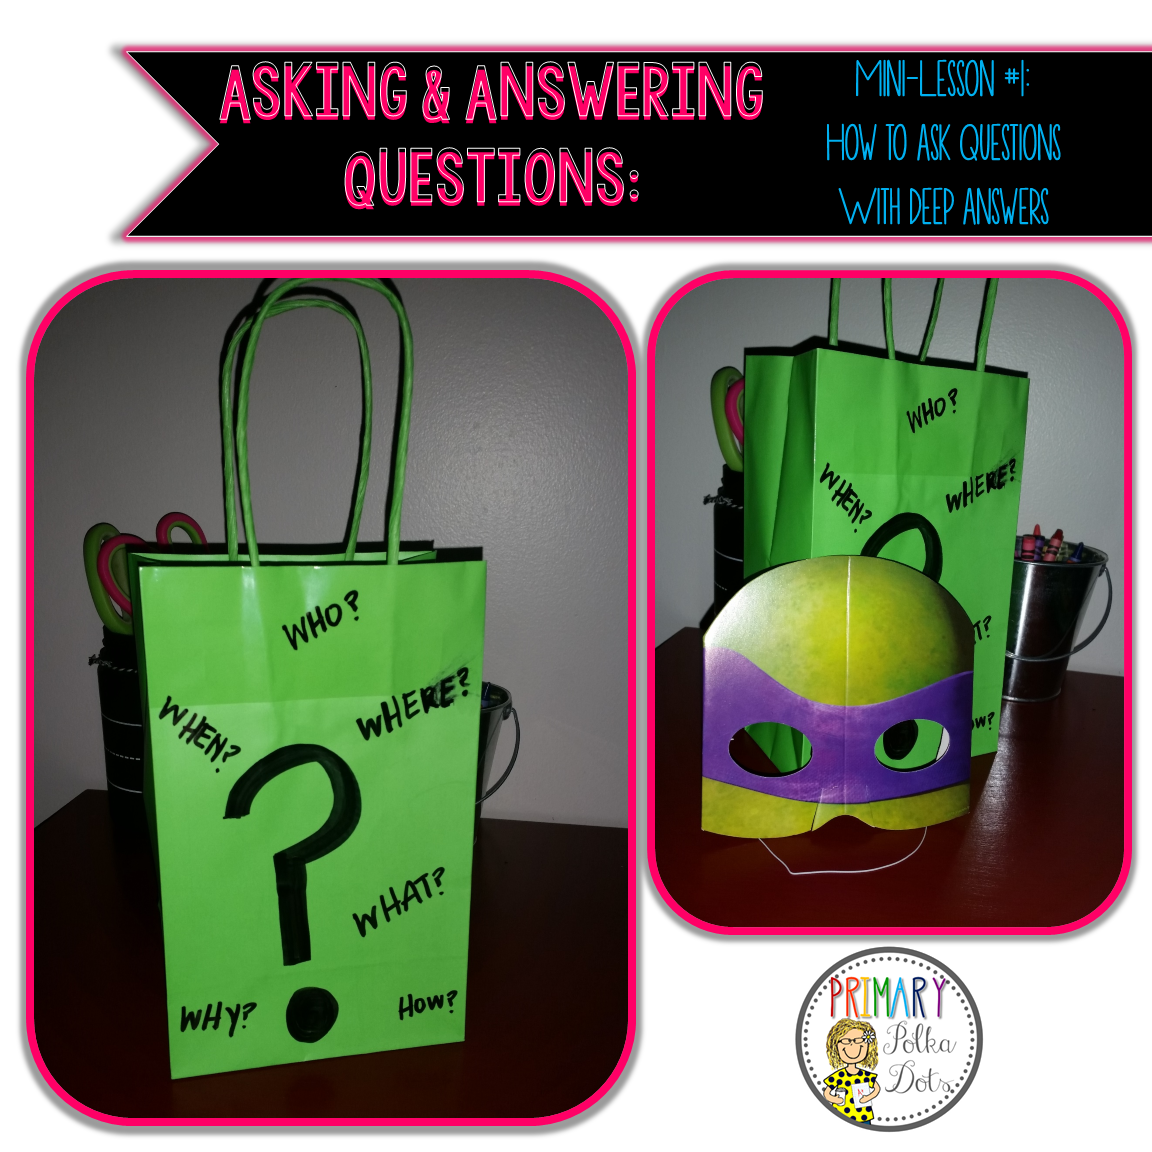
  • To begin the discussion of making deep questions, show students a bag. Tell them in order to find out what is in the bag, they must ask meaningful questions.
    • Example of Meaningful, DEEP Questions:
      • "Is the thing in the bag necessary for living?"
      • "Where might you find someone with the thing that is in the bag?"
      • "What is the thing in the bag's purpose?"
      • "Why might I need what is in the bag?"
      • "Who makes what is in the bag?"
      • "How will what's in the bag make a difference in my life?"
      • "Is the thing in the bag simple or complex? Why?"
    • Examples of Non-meaningful Questions:
      • "What color is the thing in the bag?"
      • "Is the thing in the bag big?"
      • "Is the thing in the bag ugly?"
      • "Is the thing in the bag light of heavy?"
  • Explain to the students that this is how we connect with a text. It's important to ask meaningful, deep questions to really comprehend what we are reading.

Here's a simple anchor chart that explains to students that not only do we ask deep, meaningful questions while we read, but before and after we read as well. 

Mini-Lesson #2 (No longer than 15 minutes):

  • During this mini-lesson, you will be modeling how a reader asks questions as they read. 
  • Before I read the book aloud to my students, I read it and labeled my questions before-hand. This is optional, not a must for the teacher.
  • Because the mini-lesson is only 15 minutes long, I created my anchor chart (see below) before the lesson began.
  • Also, I only read the first 8 pages with my students, modeling how I formulated questions while reading. (Refer also to the illustrations to ask questions)
  • While I was reading, I wrote my question, the page I was asking the question about, and the answer to the question as I came upon it. Sometimes, I had to infer my answer (if this is not a skill your students are familiar with, this would be a great time just to introduce inferences just in conversation).

Mini-Lesson #3 (No longer than 15 minutes):

  • Today with my students, I use a collaborative teaching method with students.
  • I modeled for them yesterday and today, we will work together to formulate questions.
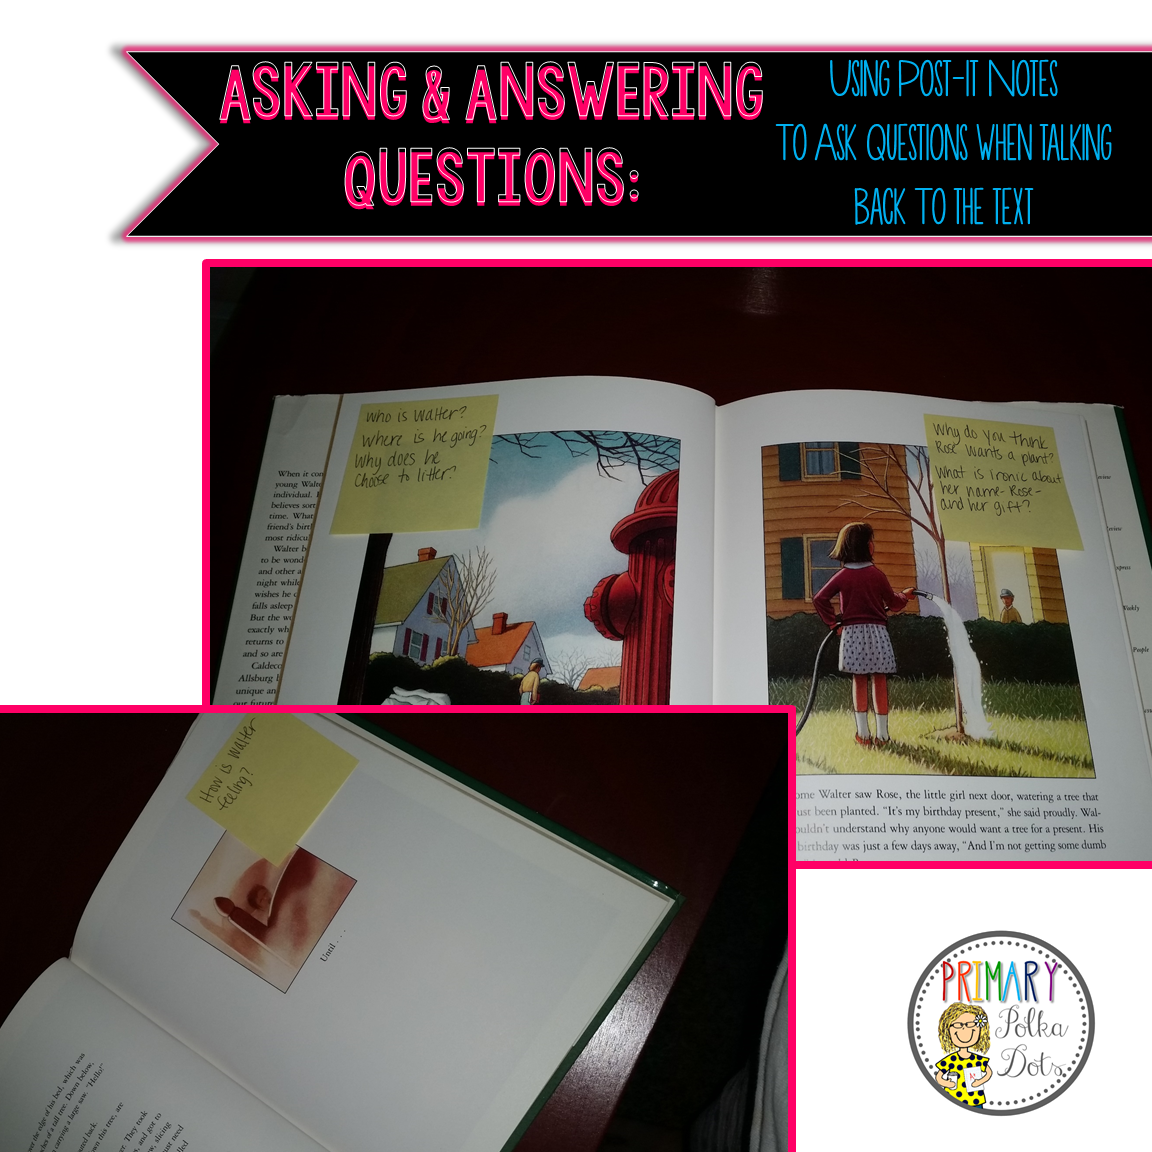
  • I continue using the book Just a Dream, and I give each student a Post-It note* to write down one question they have while I read aloud the book (*NOTE: If you follow a reader's workshop model, you may have already covered how to quietly record your thinking on a Post-It note by asking only deep questions while reading. If not, this is a great time to introduce this skill).
  • I first model formulating a question and writing my ? on the Post-It note and placing it on the anchor chart I would have created before the lesson.
  • Then, students put their Post-It notes on an anchor chart as you read. (My students were always at the carpet with me for mini-lessons. They simply stood up quietly, placed their Post -It, and sat down).
  • After reading a few pages, I would stop, reference the students' questions they posted and discuss why they asked these questions. If we found the answers, together as a class, we would identify the answer. 

Mini-Lesson #4 (No longer than 15 minutes):

  • Today with my students, I used a guided approach when conducting my mini-lesson. 
  • I would finish reading the book Just a Dream.
  • Today, I would guide students' thinking when having them formulate questions to ask after a reader finishes a book/passage.
  • After reading a book, students should ask:
    • "What was the author's purpose for writing this text?" (F & NF)
    • "What is the author's point of view of this text? How is the same or different than mine?" (F & NF)
    • "Did my opinion/point of view of this topic change or stay the same after reading this text?" (F & NF)
    • "What character in the text did I connect with the most? Why? How could I have learned from this character?" (F & NF)
    • "What is the lesson/theme/moral of this story?" (F)
    • "What was the text structure?" (NF)
  • Together with the class, create a graphic organizer on an anchor chart with these questions, and discuss them as a group.
Mini-Lesson #5 (No longer than 15 minutes):

  • Today with my students, I would use a collaborative approach with my mini-lesson. The students would be paired with a buddy at the carpet.
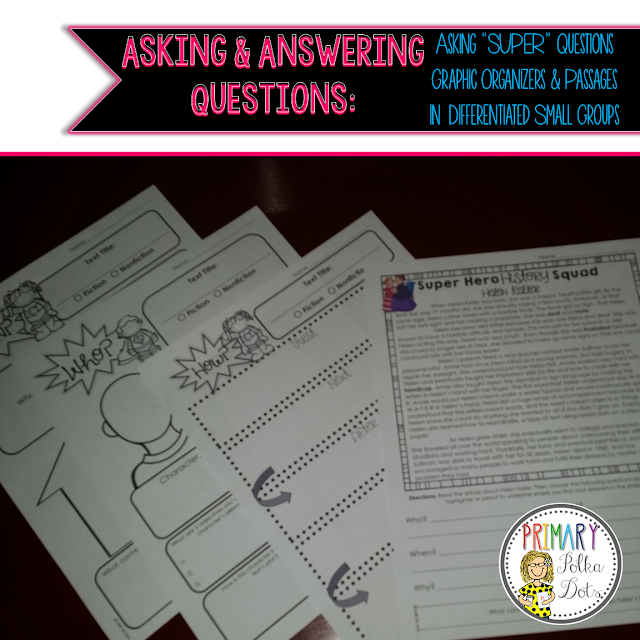
  • Students would be given the "Asking & Answer Questions" graphic organizer (a FREEBIE below) and a mini-passage (I just used mini-passages from reproducible books that came with our reading series).
  • With their partner, the students would read their mini-passage, then formulate questions before, during and after their reading using the graphic organizer (a FREEBIE below).
**********************************************************
Here are some {FREEBIES} that go along with my mini-lessons for the week! Download them by clicking the picture.


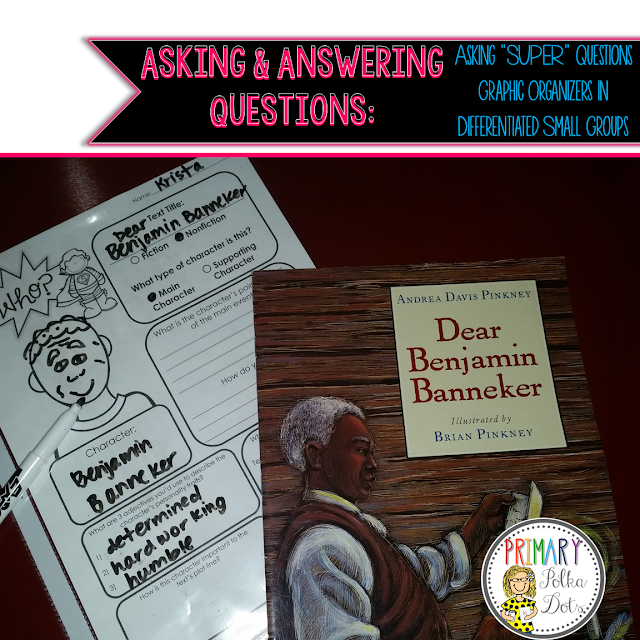
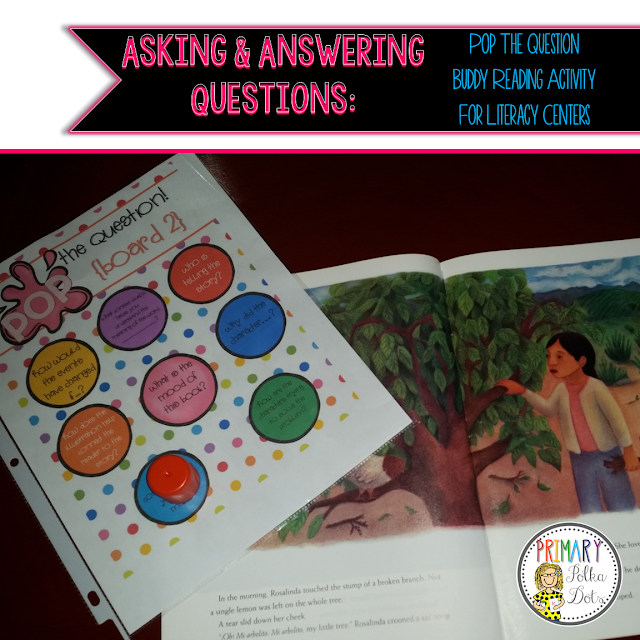
Here are some other activities I would use in differentiated small groups and literacy centers to reinforce questioning skills (see my visual lesson plans above):


I hope you found this post helpful for introducing or reviewing questioning skills with your kiddos!

What trade book do YOU use? We want to know! Link up with us!

How it Works:
  • The third Thursday of each month, we will be featuring one of our favorite trade books that we love using to teach a reading skill
  • Follow us on Instagram (@shastess and @primarypolkadots) to see what skill we will be focusing on for the month
  • Write a blog post about using a favorite trade book to teach a specific skill and link up with us!
  • If you feature a paid product, you must offer a freebie in your post.
  • Link up either under the K-2 or 3-5 linky!


Saturday, August 15, 2015

Oh, Snap! It's ALMOST September!


I'm excited to link up with Teachers Deals and Dollar Steals to showcase two of my favorite items for September.

Let's jump right into this! 

The first product for September that I want to show you is my Daily Close Reading: September pack. If you'd like to check out the August FREEBIE pack, click {HERE}. 

In today’s classroom, Close Reading and finding Text Based Evidence is a critical part of the Common Core State Standards. Starting in 3rd grade, students go from “learning to read” to “reading to learn”. Close Reading is an important part of this transition. Yes, students still need to read for enjoyment, but the majority of their reading starting in 3rd grade should involve higher order thinking skills, application of reading strategies, and talking back to the text.


These Daily Close Reading Paragraphs are great to practice true Close Reading. Before diving into a full article or even multiple paragraphs, it’s important that students can master the strategy of Close Reading in “small bites” before hitting the ground running with whole articles or even chapters.


These Daily Close Reading Paragraphs will prepare your students to best comprehend and understand what the author is saying to them and how the author manipulates the text to convey a message, either through text structure, inferences, text features or key details.

Here is a quick video of how to use these Daily Close Reading Paragraphs in your classroom!


The second product for September I want to show you is my Apples & Pumpkins: August & September Fluency Practice pack. This is perfect for grades 2nd-6th grade! I also have a FREE Back-to-School Fluency Practice pack you can check out for free {HERE}. 


Fluency is the ability to read words and phrases accurately, and to also comprehend what you are reading. Students should “read like they talk” and their words should “flow like water”. Re-ding-like-a-ro-bot-is-not-fl-ent-re-ding. Noticing punctuation stop signs (commas, exclamation points, periods, questions marks, etc.) and knowing how they are to be used in the fluctuation of a student’s voice is all part of fluency.


To use these cards with students that are struggling:
1)Use Step 1 Card: This card has random back to school words & phrases that are chunked (by different colored sentences) and  punctuated. The students will think this is funny because it’s weird words. However, they will read the nonsense sentences correctly because they will have to fully rely on how the sentence flows based on how it is chunked, and  what the punctuation is telling them to do. Read through this card once for your student, modeling how this should be done. Emphasize the punctuation stop signs and chunking. It’s not about the silly words, but it’s about training the eyes and ears to follow the cues of the punctuation and the flow of the sentences.
2)Use Step 2 Card: This card is an actual mini-passage, that is punctuated exactly as the nonsense card. This time, the sentences are chunked by colors so they know how to properly chunk the words and phrases as they read the passage. They are to follow along with their fingers as they chunk the phrases. This time, as they read, they should be mimicking the way they read the nonsense passage since the punctuation is the same.
3)Use Step 3 Card: Once the student has read through Step 2 Card, the student reads Step 3 card completely independently. They are to chunk their own phrases and use the punctuation correctly.
4)Use Step 4 Card: This ties in the comprehension and text based evidence answers. You can have the student complete this with you, or independently. 


Here's another quick video showing you how to implement these into your Reading class. 


The best part? BOTH of these products are 20% off today and tomorrow (August 15th & 16th)! Snag them up while you can!

Want to find some other great products for September? Click the button check out some more great September products!


Thursday, August 6, 2015

Teaching is as Easy as ABC, 123 {B2S Linky & Giveaway for NEW Teachers}


Happy Back-to-School season, friends! Don't you just *LOVE* it?! Even though I am not going back to the classroom this year (I'm staying at home with my almost 1 year old), I still get the same butterflies and excitement when August rolls around. There's nothing like a bin full of glue sticks for .10, am I right?!

I've linked up with some of my favorite bloggy friends to bring you a super fun linky for all of those new teachers out there! Together with Kady from The Teacher Trap, Alyssa from Teaching in the Fast Lane, and Kirsten from Kirsten's Kaboodle we have some fun BTS tips and tricks for new teachers, along with a GIVEAWAY of prizes that will be helpful as you start your very first school year!

I very much remember what my first year of teaching was like. It was full of excitement and nerves all wrapped up into one giant ball of joy. My mom was a teacher, my grandmother was a teacher, and countless other family members spent their days in a classroom. It was in my blood. {For kicks and giggles, here is my very first yearbook picture as a teacher. I look 12. And no, I don't keep this for my own sake; my grandmother has it at her house.}


So, let's get to it! Don't forget to link up below if you have some cool tips and tricks of your own to share. If you are a new teacher, don't forget to enter the giveaway!


Don't compare yourself to any other teacher. As educators, we tend to be perfectionists. We know what we want and how we want it. There are so many wonderful teacher role models out there, that sometimes, we tend to compare ourselves to someone else. Don't do it. Teach how you teach. Praise like you praise. Explain how you explain. Interact like you interact. If you go into the classroom trying to be someone you aren't, it won't work. You are GREAT just how you are. You are blessed with the students who are placed with you for a reason; they need you, not anyone else. Breathe in and out. You got this. Be you. 


A good cup. I am a Tervis nut. These are great for hot stuff and cold stuff. I actually had a smaller one for coffee and a large one for my water. You can't go wrong with a Tervis tumbler. After a while, I collected quite a few from the kids as gifts for Christmas or the end of the school year.


Velcro. I used Velcro for everything in my classroom (I'll explain a little more below). It's versatile, it's easy to add and remove quickly to items around your classroom. (Notice how I have my name written twice on this particular box. Hey - don't you be takin' my Velcro, woman!)


FREE number printable - Click {HERE}
FREE "I'm Here" & "Absent" headers - Click {HERE}

Now...for the good stuff! We have 8 AH-mazing products from our stores that we'd love for one of ya'll to WIN, plus a $60 Target Giftcard! Check out what you'd win below:


NEW TEACHERS ENTER to WIN all this awesomeness here:


a Rafflecopter giveaway

ALL TEACHERS ENTER to WIN all this awesomeness here:


a Rafflecopter giveaway If you'd like to see other B2S Tips & Tricks or have your own to share, link up below! 
{Simply add the first image (the one at the top of my blog post) to your blog post. Also, include your 1, 2, 3 Tips, Tricks & Advice for new teachers and add the direct link to your Tips & Tricks post here:}


Sunday, August 2, 2015

Writer's Workshop for 3rd-5th Grades

If you're a teacher and you've ever taught writing, I need not insert the thoughts that run through your head as you read a piece that you've worked on for 2 weeks only to get something that looks like this:

I went to the beach. It was fun. The food was good. I had fun. My sister bought a t-shirt. It was fun. We had fun. They had fun. I can't wait to go on vacation next year. It was fun.

Yes. We've all had these Newbery pieces of writing come across our desks. And yes, we've all wanted to bang our heads against the wall. Until we pass out. And then hopefully we'll wake up in the Magical Land of Fantastical Writings.

Well, **newsflash**. MAGICAL LAND OF FANTASTICAL WRITINGS does not exist. Believe me, I've tried to find it. BUT...

...there is HOPE and SUCCESS that comes from Writer's Workshop!  

Once your students have been taught how writer's workshop works in the classroom, their writing will improve as you teach them what they need to know, model how an author is "born" and praise the tiniest of successes in their writing endeavors.


Here is a simple breakdown of how I managed Writer's Workshop (WW). The district that I worked in whole-heartedly believed in Jennifer Jacobson's approach and model of teaching writing to students. I used her graphic organizers time and time again before I ever knew who she was, and once I learned about her model of teaching and leading WW, I was hooked. 

Our district sunk tons of money into training our teachers how to properly lead a successful WW in the classroom. I saw Jennifer several times during PD's about her book No More "I'm Done!". If you haven't read it, I would highly encourage you to. She has tons of great ideas for mini lessons and how to structure your WW. 

No_More_2

After hearing Jennifer explain how WW should be set up, and watching other teachers in my district lead their own WW, I was ready to attack this beast. 

I had 60 minutes for WW each day. My WW block of time looked like this:
  • 15 minutes: Mini-lesson at the carpet
  • 10 minutes: "Quiet 10" (I'll explain this in-depth below)
  • 25 minutes: Work on Writing at their desk, Peer-Editing and Conferences with me (I'll explain this in-depth below)
  • 10 minutes: Author's Chair (I'll explain this in-depth below)


I conducted 98% of my mini-lessons from the carpet in front of my anchor chart. I would tell my students what they would need (if anything) when they came to the carpet. I would use mentor texts often to show how published authors used descriptive words, imagery, figurative language and so on and so forth to connect with a reader. The series of mini-lessons below were about all focused on setting. 

Day 1: Setting Mini-Lesson
  • I told students to come to the carpet with a pencil and something hard to write on.
  • I  told them to sit on their "something hard to write on" and their pencil and to close their eyes as I read them a few pages of the book Bear Snores On by Karma Wilson.
  • After I read the first few pages, I gave them each a piece of paper and told the students to illustrate what they thought the setting looked like based on the details from the text. 
  • The illustration from the book showed a cave, a tree, a bear and a few other animals. The students were spot on with their own sketches based on the details the author used in the text. The students recognized the importance of details and the use of imagery in their writing when describing a setting of their story.


Day 2: Setting Mini-Lesson
  • The students came to the carpet and saw the purple writing on the anchor chart. 
  • First, I modeled how to insert key details about the setting described in these few sentences.
  • Then, I had a second anchor chart with a similar "boring" story. Together as a class, the students helped me edit to add juicy details to bring life to the setting of this story. 

Day 3: Setting Mini-Lesson
  • The students assembled at the carpet and I read to them several pages of Island Baby by Holly Keller.
  • The students listed details from the text about the setting.
  • Then, I labeled the details about the setting to represent the 5 senses.

During Quiet 10, students were to take back what they learned during the mini-lesson and apply it to their own writings. This is the only time they could use an ink pen during writing class.

The "MUSTS" of Quiet 10:

  • The students must stay in their seat and be writing the whole time.
  • The students must stay quiet and focused on their writings.
  • The teacher must also be writing while the students are writing.
  • The teacher must play some type of music (I just had a classical music CD that I played everyday during Quiet 10).
Students can start a new writing, or they can work on a writing they've been working on all year long. However, the students need to be applying what they learned at the mini-lesson during their Quiet 10 writing time. 

For example, the students spent their Quiet 10 time editing a story they had been working on by focusing on details about setting in their stories.


I loved this example of how a student added more details to her setting.

She added details about "red punch" and "people dancing to the jazz music".

Their edits are noted by using ink pens.


After Quiet 10 ends, the students do 1 of 3 things:

  • Peer Edit their writings with a buddy 
    • I had pre-determined who would be their Peer Editing Buddy.
    • Students would use a pencil while peer editing with their friends. 
  • Conference with me at the back table about their writings. 
    • I would keep a journal and calendar of who I wanted to meet with for conferencing, and how each student was progressing. This was great for RTI data and parent conferences. 
  • Continuing to write on their own independently at their desk.


Students would sign up to meet with me at the back table. Once I called their name, they would go to this tiny board and erase their name, and another student would fill their spot.

When coming to me to conference, the students would sometimes have an idea of what they wanted to conference about, and sometimes they wouldn't. Either way, I would always take it back to skills that they needed to improve on and the skill we were working on during the mini-lessons.


I would keep a calendar of who all I'd met with during the week and who I wanted to meet with the following week. You will always have that one kid that wants to meet with you in conferences everyday. However, that just can't be the case. Each conference should only last 5-8 minutes. 


I'd just jot down simple notes about the story I helped them edit and the skills we worked on that day.

To close out WW, I choose 2-3 students to sit in my "teacher's chair" at the carpet. Most of the times, it would be students that I conferenced with that day.  The students would then read their stories aloud to the class. The students sitting at the carpet would then ask the "author" questions and make comments about their writing. I had a poster behind my teacher's chair that helped prompt their questions and comments during this time. I also kept up with who shared at Author's Chair using a calendar.


After doing this for a year, I loved it. I was hooked. I'll never teach writing any other way.

I also created a resource that helped me and my students stay better organized during WW! Plus, it just looked a lot cuter! {Which of course is the most important thing!}

It has everything YOU need to conduct WW:

  • Individual conference forms
  • Conference Calendars
  • Author's Chair Share Calendars
  • CCSS Writing Checklist for 3rd-5th Grades 
  • Ideas and directions on how to conduct WW in your classroom

It has everything your STUDENTS need to participate in WW:
  • 3 different binder covers to choose from
  • Conference note sheet
  • Table of Contents for published pieces
  • Mini Graphic Organizer Anchor Charts
  • "Spicy Words" Mini Anchor Charts
  • "Juicy Color Words" Mini Anchor Charts
  • Grammar Mini Anchor Charts


I hope this helps you implement WW in your classroom this school year!

What do you do to make your WW successful?